Silhouette Love

silhouette.jpg

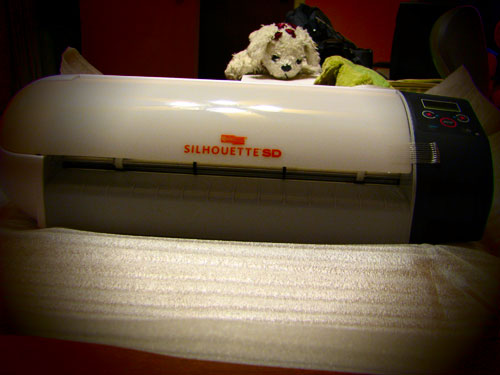
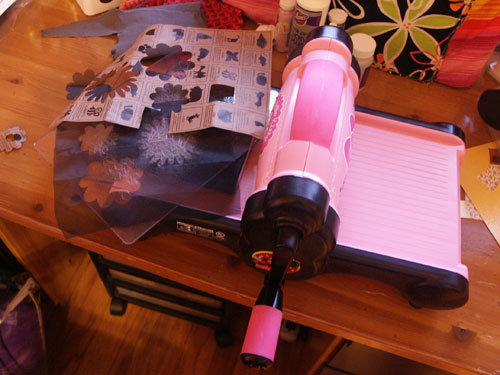
I bought a Silhouette Machine back in September! There were a whole bunch of blogs hosting giveaways of the machine and I had entered every one of them. Needless to say, I did not win. I tried to convince myself I didn’t need one but then discovered that Overstock had a great price on it plus I had a $10 coupon and with $3 shipping, well, welcome to your new home!

When I bought the machine, their software wasn’t compatible with Mac just yet but they were supposed to release the software around the same time (they were a little delayed.) There was a plug-in to use it with Adobe Illustrator so I was using that for a bit. I was really excited when the software came out because then I was also able to shop the store for shapes! There were some glitches in the software and I was pleasantly surprised that contacting customer service was a nice experience! They responded pretty quickly and put me in direct contact with the programmers of the software. I helped them test out different versions of the software so the machine got a bit of a workout early on. That’s a good thing, tho! It helped me get used to the machine. Here are some projects I did with it.

thankyoucards.jpg hellocards.jpghbcards.jpg
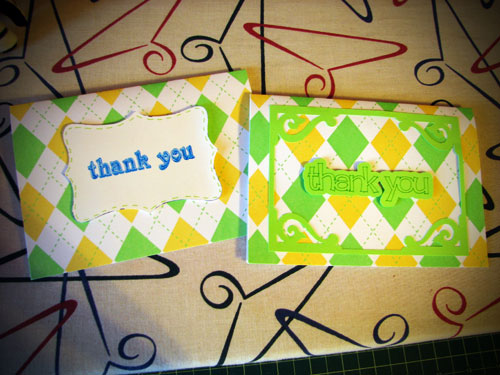
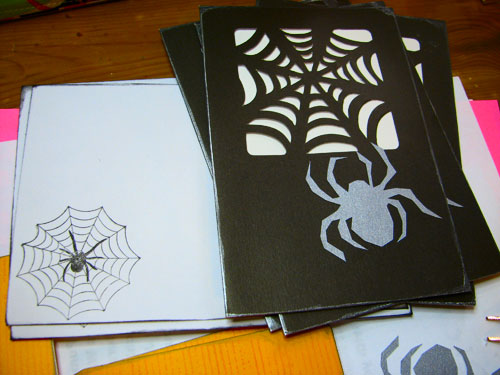
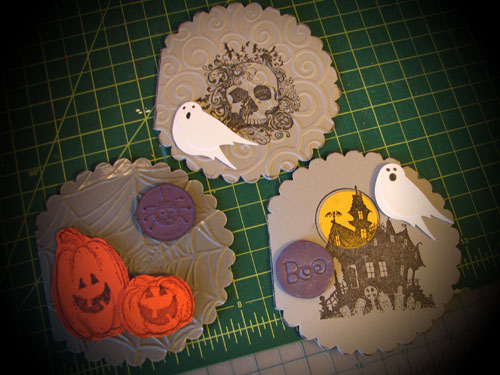
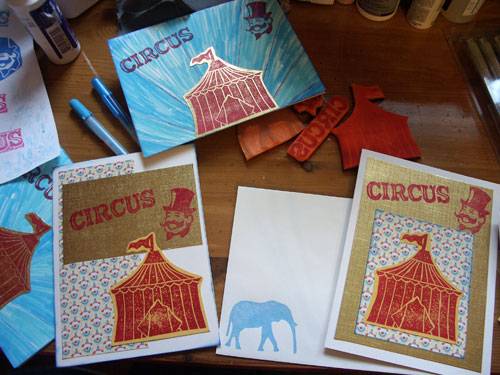
One of my first projects was making this card set for a swap. Pretty simple stuff but I was still feeling the machine out. I used the sketch pens for the thank you card on the right.

siennadoor.jpg
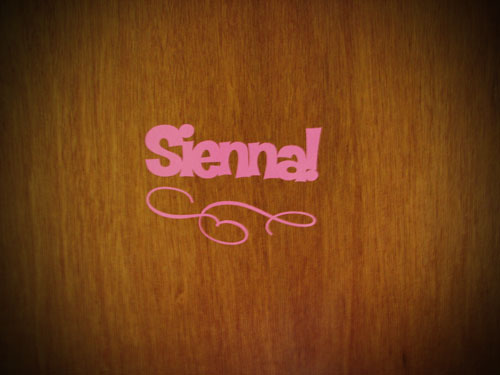
I made this with vinyl for Sienna’s door. It’s a tad bit crooked because I didn’t use transfer tape to help it on.

hshirt.jpg
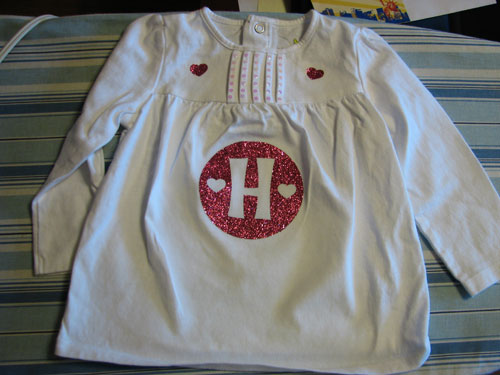
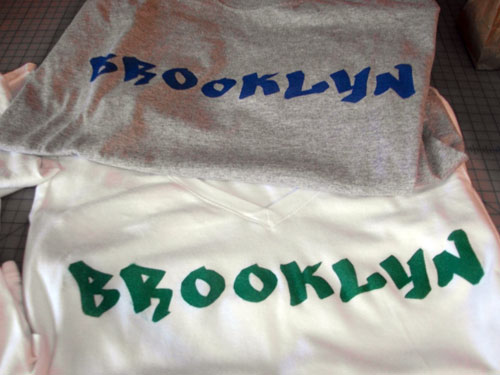
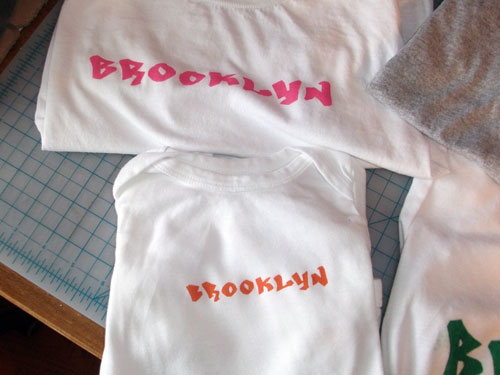
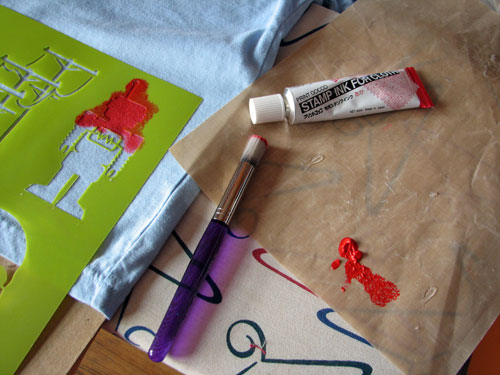
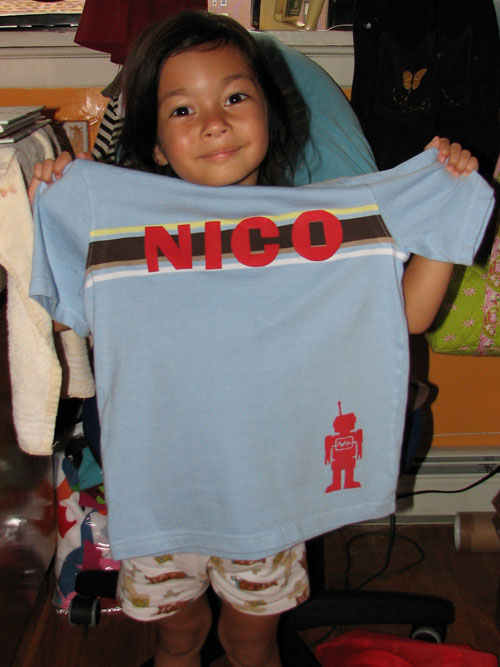
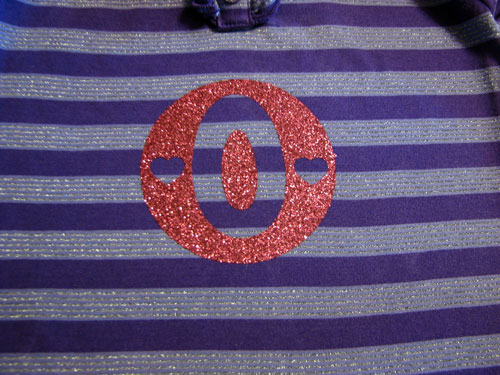
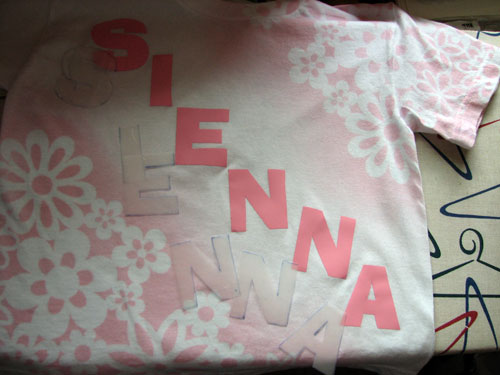
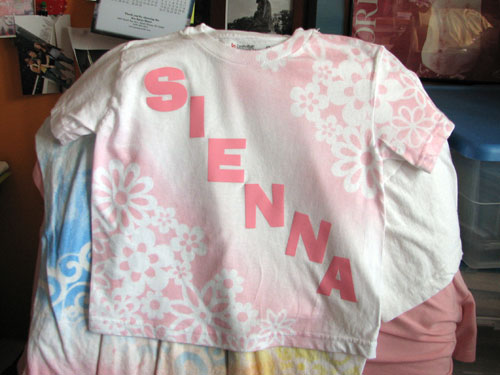
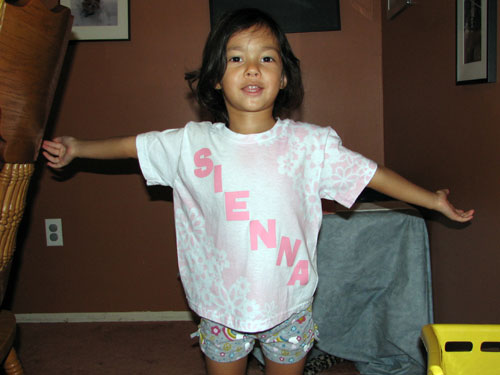
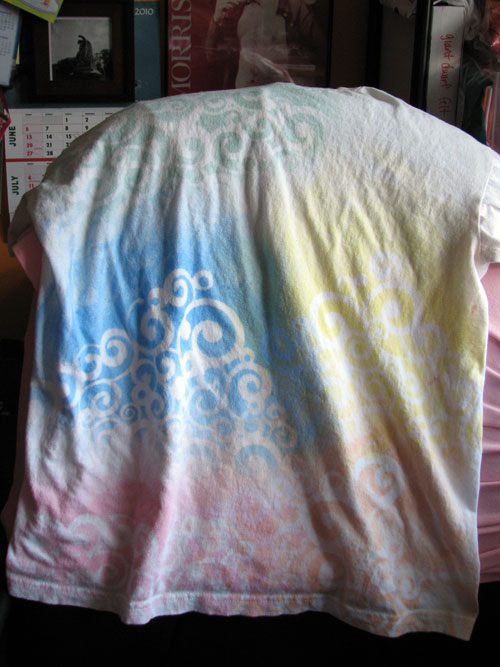
I made this shirt for Hailey’s birthday.

oshirt.jpgeshirt.jpg
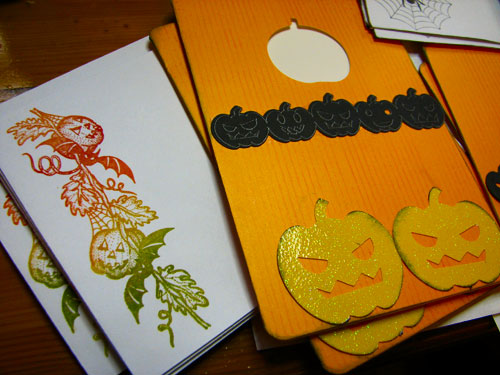
These were for Emily and Olivia’s birthday. I wanted to do a different design but my brain wasn’t functioning (I was just starting to get sick!)

christmastags.jpg
Christmas tags for a swap

teapotcupnecklace.jpg
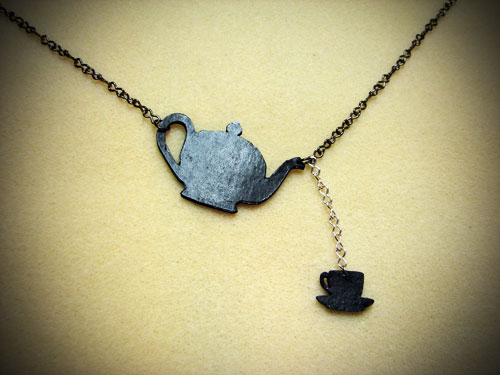
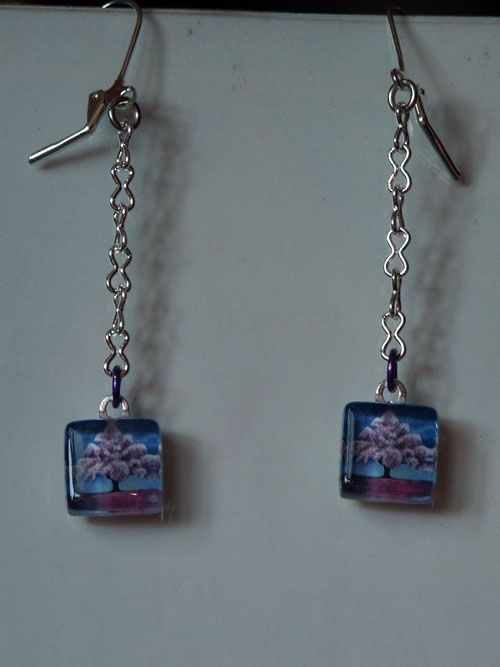
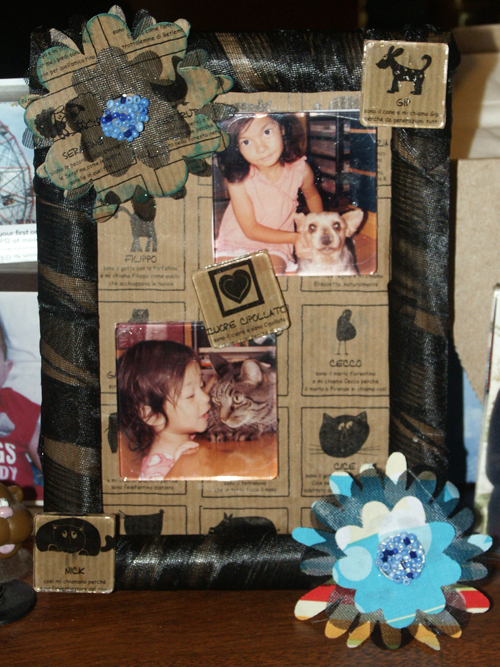
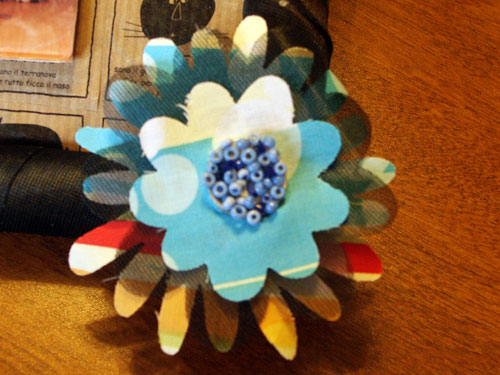
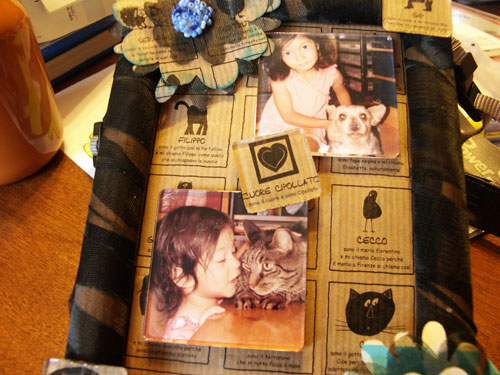
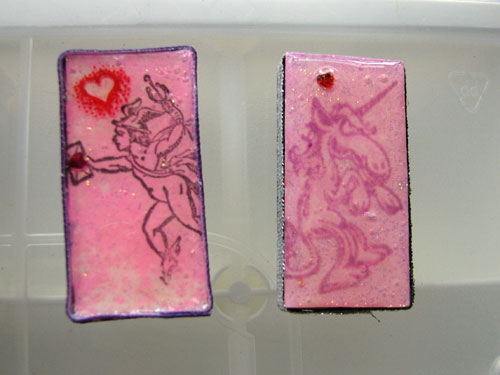
I’m really happy with how this came out! This was for an Etsy inspire swap. You look on your partner’s Etsy faves and create something inspired by their faves. I hadn’t intended to outright copy it but when I saw it on my partner’s list, the Silhouette was the first thing I thought of. I did this by layering paper and coating it. Here is the original item, which is made from recycled vinyl record, pretty cool in itself!

recipeswap.jpg
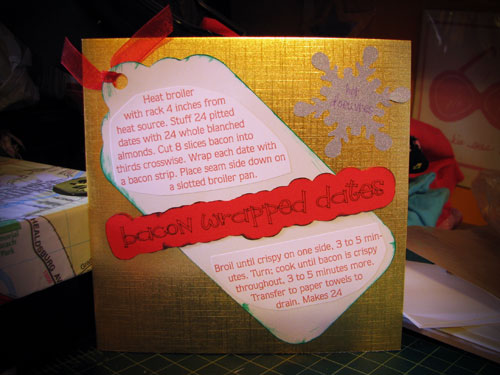
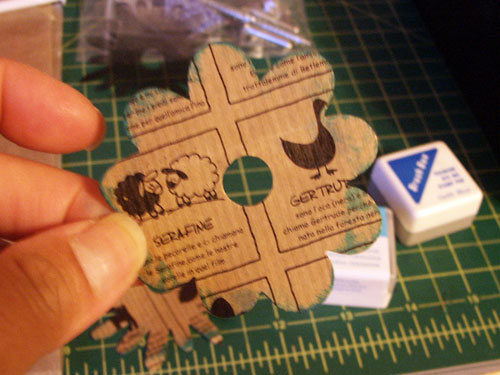
This is for a recipe swap on the Silhouette users Yahoo group. I cut out the tag, the snowflake and the title with the machine. I used the sketch pens to write out the title and also for the hors d’oeuvres written on the snowflake.

eiffeltowerholder1.jpg
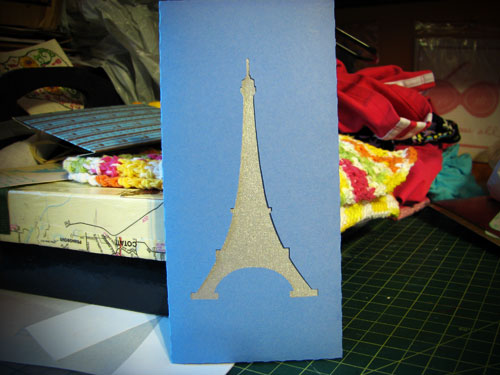
This was also for the Etsy inspire swap. My partner had Paris bookmarks on her list so I made her bookmarks with photos from my honeymoon in Paris (bookmarks will be shown in another post). The holder was also cut out and was intended to be used as a money holder and I cut out the Eiffel Tower in the middle.

eiffeltowerholder2.jpg
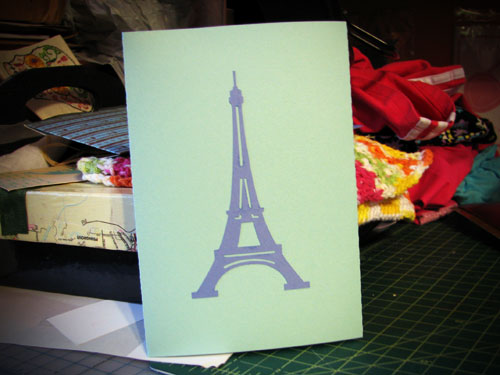
This one held photos of Paris and I used the cut out from the previous item and glued it on here!

gsheartorn.jpg
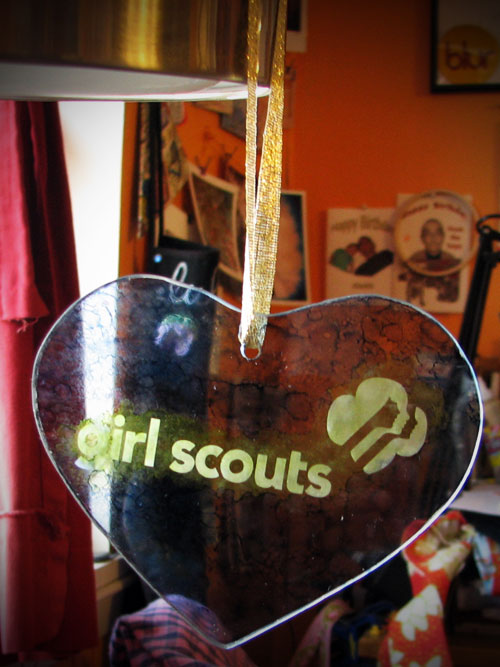
I used the Silhouette to cut out this GS logo (my partner is a Junior GS leader) and used it to etch it on the glass ornament. I suppose I could have left it as is but I used alcohol inks to give it some color. It was so much fun! I have 2 more glass ornaments that I am definitely going to do something similiar (not with the GS logo tho!)

slogoshirt.jpg
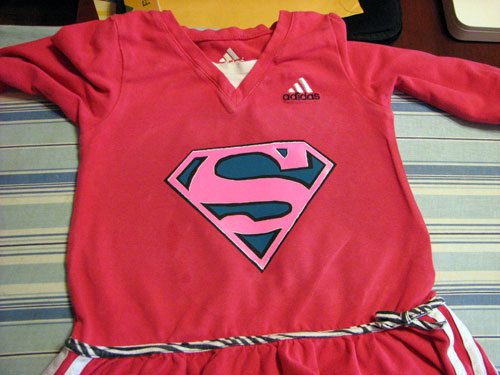
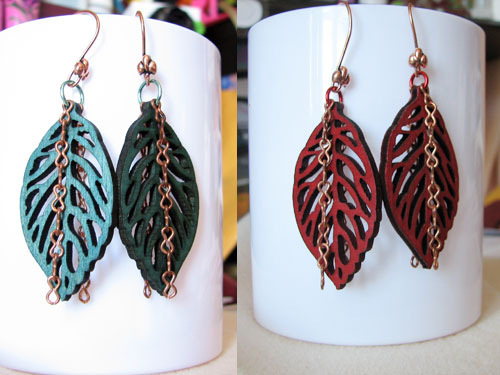
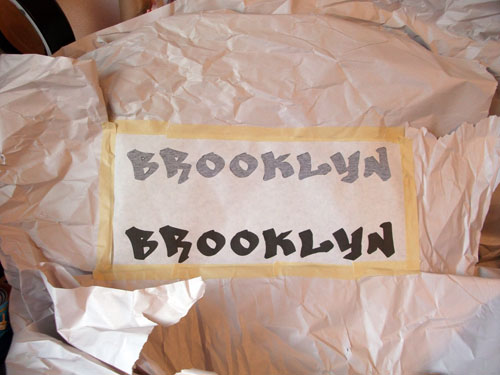
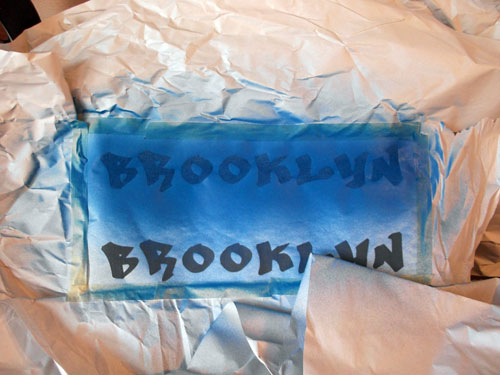
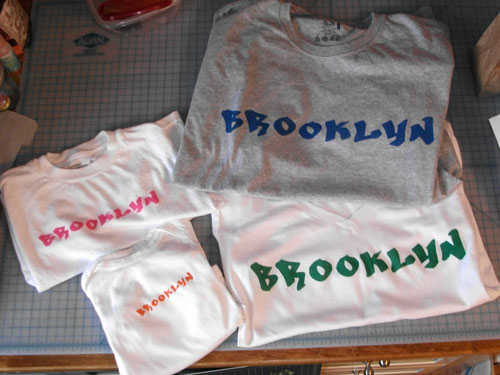
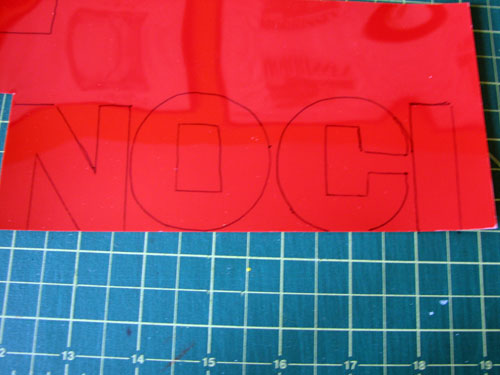
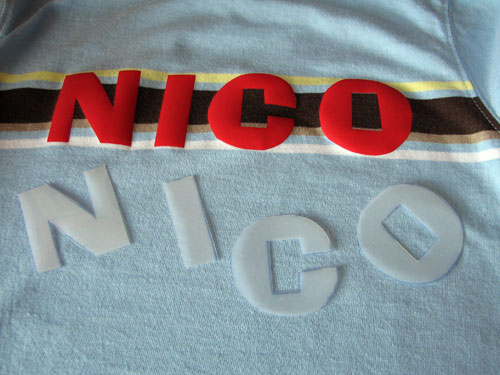
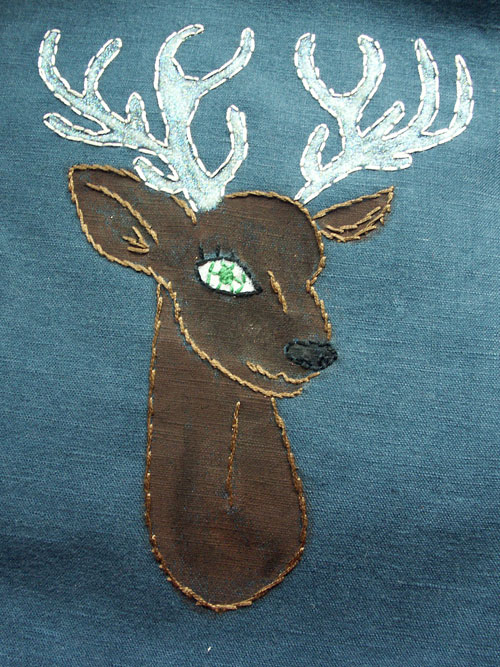
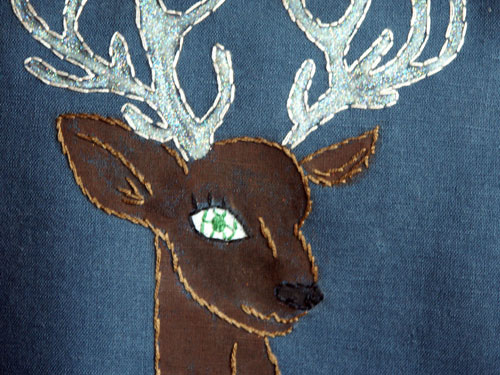
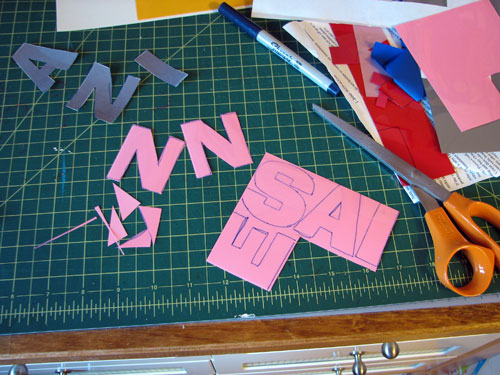
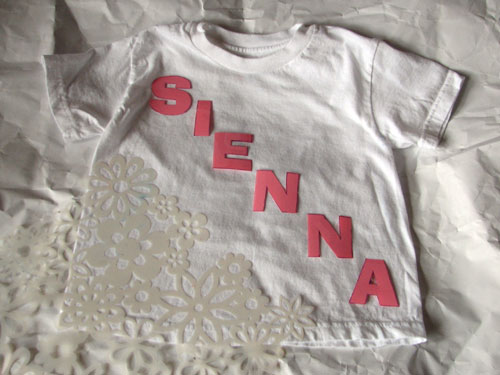
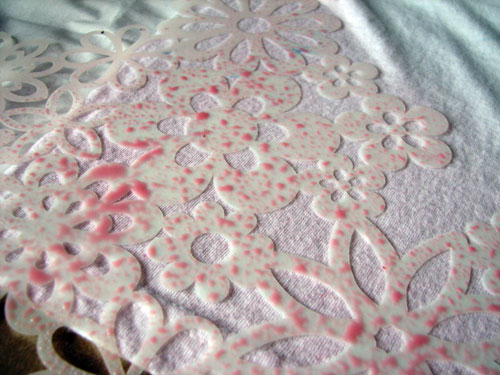
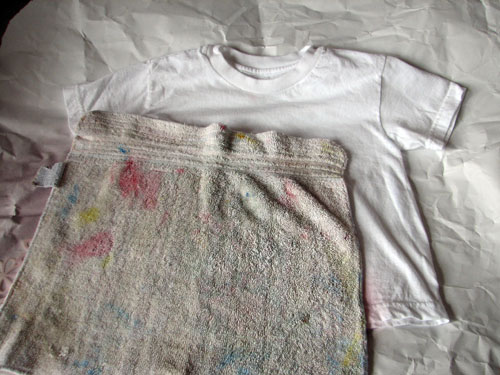
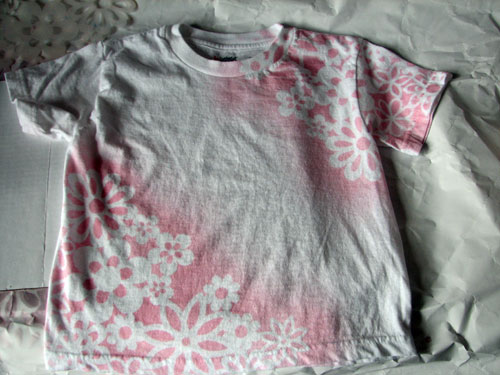
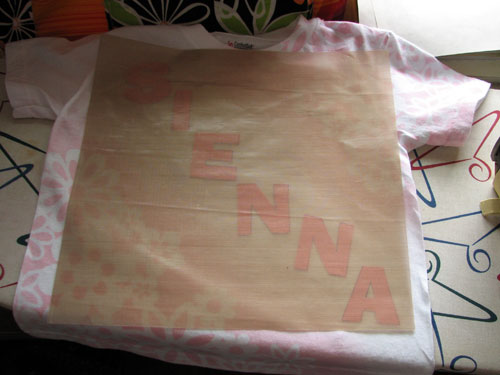
This was the latest item I made. Sienna somehow got grease stains on this shirt and although this logo doesn’t cover all the stains, I figured you would be distracted by the logo to notice the stains! HA! The pink is neon and I think I had the iron too hot so it melted it just a tad. That is why there is a little white around the pink. I’m very happy with it just the same!

Happy Halloween!

Some Halloween themed crafts for swaps:
halloweencardset.jpgspidercardcloseup.jpgpumpkincardcloseup.jpg
The cards were already die cut with the pumpkin and spider web. I enhanced with some rubber stamps and cut outs from my Silhouette machine.
devilcrochet.jpg
corporatezombiecrochet.jpgcorporatezombiecrochetclose.jpg
the devil and zombie are from the book Creepy Cute Crochet
ghostfingerpuppetcrochet.jpg
Finger puppet pattern from the Lion Brand website
zombiefeltie.jpg
From the Zombie Felties book
zombiepig.jpg
Count Truffula pattern from q.D.Patooties.
halloweencards.jpg
From a recent Stampin Up meetup. We also made a candy corn box that I forgot to take a photo of and I sent it in a swap!
halloweencarvings.jpg
I really like that frankenstein!
And last but not least, Sienna painting her magic wand for her princess costume!
siennapaintswand.jpg

Happy September!

I can’t believe it is already September! The summer seemed to fly by and in a couple of weeks, Sienna begins school! It’s just nursery school for 3 hours a day but this will be the first time she is away from me for so long. This is just the beginning. Before I know it, she will be in real school all day!! I can’t even imagine. At any rate, this post isn’t about Sienna! Here are some of the swaps I sent during the summer!

shakerpc.jpg
A shaker postcard swap. My partner likes lighthouses so I dug through my archives and found this photo I took when Yves and I went to Washington State right before Sienna was born.
owlstitch.jpg
An owl stuffie from the Stitch Fall 09 magazine. I’ve already made the raccoon and the chipmunk is the last one in the trio!
woodlandprofile.jpginsidepouch.jpg
The owl stuffie was part of the Woodland Profile swap. I made my partner an owl pouch, woodland creatures glass magnets, hedgehog keychain, and a mushroom keychain.
catglittersquare.jpgcatglittercircle.jpg
I’ve been experimenting with some glitter and rub ons (print my own rub ons that I got for my birthday from Yves). I made the top one into a keychain for a keychain swap and the bottom one is a pendant for a WTA in one of the groups I’m in.
birdspc.jpg
Bird pc for a mail art group
redfloral.jpgorangefloral.jpg
I joined a swap to make Red flowers from this pattern. I had so much fun making them that I joined the swap to make orange ones. I almost did not want to send the orange ones away. (Unfortunately I’m still waiting for the orange swap from my partner and it’s past the due date. argh!)
owlleavesearrings.jpgbrasscircles.jpg
We had 3 partners for a handmade earring swap. The above 2 sets were for someone I knew personally!
starsearrings.jpgflyingpigsearrings.jpg
These 2 sets were for the host of the swap, who likes flying pigs (I had her for a partner before!)
3whiteflowers.jpgpurpletrees.jpg
It was hard to make this last set for the last partner because she really didn’t indicate her likes in her profile. Still waiting to hear if she likes these!
deerfullcolor.jpgdeerclosecolor.jpg
This was for a Sublime Stitching embroidery swap. I had bought these Aunt Martha paint pens thinking I could use them to color in the patterns (I see such beautiful coloring by so many people!) They didn’t turn out the way I thought (it’s supposed to be used for outlining, why would you want to do that?!) Anyway, I figured out how to use them, which I’ll show in another post. Here I used my gocco fabric paint for the brown and used the glitter paint from the same Aunt Martha order.
circusnotecards.jpg
These notecards were for the Hand Carved Stamp group. I just finished reading Water for Elephants and was inspired to do a circus theme. I carved the circus tent, CIRCUS, elephant and ringmaster. I even had some clown scrapbook paper!
bunnyglasspendant.jpgbirdbracelet.jpg
And finally, for the woodlands wearable swap (I’m finally happy with the photos) ! I made my partner a bunny pendant necklace and a bird bracelet. I’ve gotten a lot of uses out of the woodland graphics I got from Etsy seller Plan F Studios and the bird is from Piddix.

August Challenge

Christy Nelson’s August Challenge snuck up on me, as they usually do. I know I say this every month but when this month’s supplies came, I really thought Oh, boy! What am I going to make with this? I was baffled.
augustcomponents.jpg
We got some black polyester fabric, some cute animal paper and blue glass beads (from Italy!), some hardware bits (from Ikea) and a sample pack of adhesive squares.

I was really thinking and thinking about what to do when I was looking at an old wooden frame that was on my desk. I thought the fabric might look neat wrapped around the frame. I cut some of the polyester into strips and began wrapping them around the wood. I thought about painting the wood but thought the natural color would keep with the color theme of the paper.  I used the adhesive squares and it stuck it really well.

strips.jpgframe.jpg

I liked how it came out! I knew I wanted to add some embellishments and used my Sizzix and the flowers layer #3 die with the rest of the paper and polyester (did you know that if you placed paper on top of fabric when cutting, it will be a cleaner cut for the fabric?) and added a bit of color to the edge.

sizzix.jpg
floweredge.jpg

I knew I wanted to use one of the nails for the middle of the flower. I used this white plastic nail and put one of the adhesive squares on it (I was a little leery but it worked out!) for the beads and a little glitter for bling. (I couldn’t get a good photo of the adhesive on the nail so you’ll have to make do with the beads and glitter!)

nailmiddle.jpgglitter.jpg

Then I thought, now what am I going to do? I liked the animal theme of the paper and decided to go from there. I used Tim Holtz’s Fragments to glue over 3 squares I cut out of the paper for more embellishments. Here I show 2 of them, a dog and a cat. The 3rd one is a heart.

fragments.jpg

It started coming together real fast so there are less assembling photos. Here it is all finished and on my desk!

onmydesk.jpg

I printed out 2 photos of my daughter Sienna, one of her with our cat Neo and the other with our dog Skippy (get the theme I was going for?) I glued bigger pieces of Fragments over them. I used the rest of the paper for the background, added another flower and found a spot for this on my desk! Here’s some close ups!

augustchallenge.jpgcloseupflower.jpg
(it’s too bad you can’t see the glitter in the photo. Believe me, it’s there!)
closeupflower2.jpg
I used cotton fabric for this flower to add a little bit of color
closeupinside.jpg

Good swaps

I know I say this all the time but I really need to be a lot better documenting the swaps I receive from people. I got a couple of really good ones lately. I was really wowed by this swap from Pandessa for the Make me Something/Anything swap. Having done felt food, I know how much work goes into making it. Check it out!! A whole bento box full of sushi!
sushifelt.jpg
(a little blurry because I was trying to be quick! See those snatchy fingers in the top left corner?)
siennasushi.jpg
Sienna loves playing with it and now has her own when we get sushi!
cupcozy.jpg
And as if the felt sushi wasn’t enough, she included this cup cozy she crochet!

These earrings came as a complete surprise for me! Mamacrafter, the partner I sent the A-Z Creative swap to loved the package I sent to her so much that she bought these from my Etsy Favorites! How sweet is that?? The earrings are from Heather Boyd.
cameraearrings.jpg

Here’s one I did a couple of months back for the Handmade Summer Dishtowel swap. My partner likes things showing where you are from so I used the taxi cab fabric from the City Quilter and printed out one of my holga shots of a street sign onto printable fabric and sewed it on.
taxidishtowel.jpg

Here is one of the items I made for the A-Z Creative swap I mentioned above. My partner had something similiar to this on her Etsy favs so I made her one! The artwork is from TTGart.
treependant.jpg

I had lots of fun stitching this one up! It’s a free pattern from Aimee Ray (I can’t wait for her new book to come out!) This was for the Make Me Anything profile swap as I mentioned above. My partner loves unicorns/pegasus so I made this pillow using one of Yves’ almost made it to goodwill linen shirts. Her hair and tail are made up of 3 different strands of floss with one being a metallic. Unfortunately, the photos don’t really show the sheen of the metallic, which is too bad because it looks really cool!
unicornembroidery.jpg
unicornpillow.jpg

This next one is for the Woodland Handmade swap. This pattern is from Fall 2009 Stitch magazine (I made the cat pillow from this magazine too!) The tail called for needle felting and I finally pulled out my kit that I bought earlier this year and never tried. Well, I need a lot more practice as it came out pathetic (my partner rated me a 5 with a heart anyway!)
raccoonfelt.jpg

This one is not for a swap. My friend Barbara from Seattle put a call out for some penguin stamps so I carved one for her.
penguinstamp.jpg

And speaking of carving, I made this for a Winner Takes All game on one of the group forums on swap-bot. It was for profile surprises and my partner (Pandessa) likes pentagrams.
pentagramstamp.jpg

These are the Altered Domino Magnets I made for the swap of the same name.
altereddom1.jpgaltereddom2.jpg

And 2 holidays in August for the Wacky Holidays swap! A crocheted potholder for Happy Watermelon day and a pendant for Happy Daughter’s day (her daughter likes Nightmare before Christmas and black and pink!)
watermelonpotholder.jpg nightmarependant.jpg

Stencil and Vinyl

Continuing on my t-shirt kick, I made one for Sienna. I was excited to combine some stenciling and heat vinyl on her shirt. I don’t usually do step by steps but I thought it would be a good reference. I used Sienna’s favorite color, pink!

For the stenciling, I used one of the fabric sprays I made with the Earth Safe Finishes product. I wrote a post about it here (I have since gotten some tips from ESF for a truer red, more experimenting to come!)  For the vinyl, I used heat vinyl I bought from Nick at Craft Vinyl earlier this year. He is really an awesome vendor! My vinyl arrived the same week (I ordered regular vinyl, glow in the dark vinyl and the heat vinyl.) I was really excited to try the heat vinyl (initially with my Sizzix to cut) and was totally bummed when the instructions say not to cut through the protective layer of the vinyl. Drat! All the fancy digital die cutters can do that (none of which I have but feel free to buy me one!)  but certainly not a Sizzix machine. I tried looking online for some helpful tips or videos. There was nothing. I finally wrote to Nick and he asked me to call him on his 800 number. He was so very nice and informed me that it was ok to cut through that layer and just use my nails to take it off that layer. I was still reluctant so had done a test on a scrap shirt. It was easy to come off! And if you don’t have nails, you can also put it through the wash and it will come off there too or at least loosens it up to make it super easy to come off. What a relief!

For the heat vinyl, I printed out her name on my computer, cut those letters out and then traced it on the heat vinyl. Because of the plastic protective layer on the vinyl there were no worries of my marker transferring to the shirt.
lettercut4a.jpg

I did an initial layout:
siennashirtstart1.jpg

Then started spraying! I used ESF’s tackifier to keep the stencil down. Stencil is from The Crafter’s Workshop. I learned while doing my test shirt to do the spraying in layers
stencil2.jpg

and to dab off the excess between each spray
stencilsoak3.jpg

the spraying is done!
stencildone4.jpg

Now on to the vinyl!
letterlayout5.jpg

I’m not very patient so did all the letters at the same time. Here is the teflon sheet you should use over it and then iron. You don’t need to iron for very long but make sure you keep it moving! Let it cool before peeling the protective layer. If you see the vinyl coming off when you try peeling it, don’t worry, just iron it some more.
teflonsheet6.jpg

You can see the layer that I peeled off. I may keep them to use as templates or stencils for future projects.
letterpeel7.jpg

All finished!
siennashirtfinish8.jpg

And Sienna was kind enough to try it on and pose for me!
siennashirtwear9.jpg

Earth Safe Finishes

I discovered Earth Safe Finishes from the Totally Creative online magazine. ESF makes environmentally friendly, VOC free paints and varnishes. Now, I am all about being green and using less toxic stuff but to be honest, what drew me most to this product was the ability to make my own paints/sprays in my choice of colors. I ordered their green gift starter kit that comes with 3 colorants (red, yellow and blue), a bottle of fabric magic, acrylic paint base and ultra thick. I added a bottle of tackifier and a bottle of white and black colorants (to make sure I have endless color possibilities!). It came within the week! Wowee!

I was especially excited to use their fabric magic for spraying using stencils! I do enjoy using my ColorArtz (as seen here and here) but the smell can really get to you! And with Sienna around the house, I always feel guilty using it. I bought a dozen 4 oz spray bottles and went about mixing all different colors. I even tested them before putting them to use. Here is a scrap shirt I sprayed with 5 colors I made. The pink, green and orange were mixed and obviously the blue and yellow were not. I put between 5 and 10 drops for each color. This is before washing:
spraytest1.jpg

and after washing:
spraytest2.jpg

Not as vibrant (which is to be expected) but you know, not too shabby either! Also, the lighting isn’t exactly the same in both photos so this is not really scientific. I was heavy handed with my spraying so when I lifted off the stencil, the paint slid off the stencil and onto my shirt. I’ll have to remember to clean up the excess spray next time.

My first really project was for my new earring display so I used the acrylic paint base and red. I was really looking for a true red but didn’t get it. I guess because the acrylic paint was white. The bottle says you only need a couple of drops but I ended up putting a lot of drops in. I don’t remember how many but definitely more than a few. I still didn’t get the red I wanted but the end result wasn’t a bad color. That was a little perturbed about it and not sure how to get a real red. I’ll have to keep experimenting.
esfacrylicpaint.jpg

For my next project, I wanted to make fabric paint for stenciling the robot on Nico’s shirt as seen here. The “recipe” called for water, fabric magic, the colorant and ultra thick.
esffabricpaint.jpg
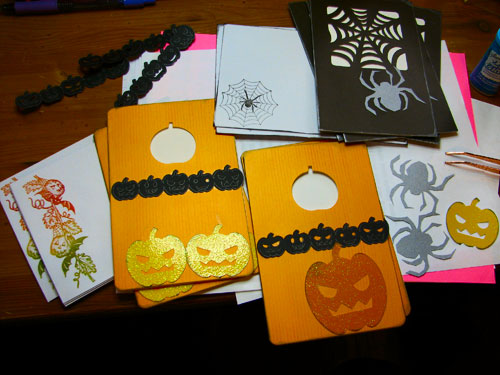
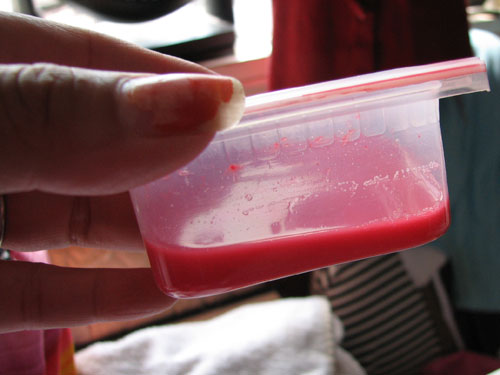
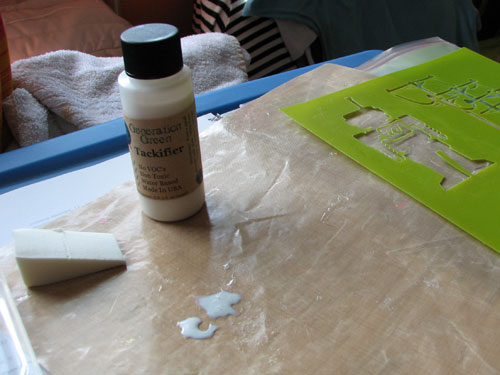
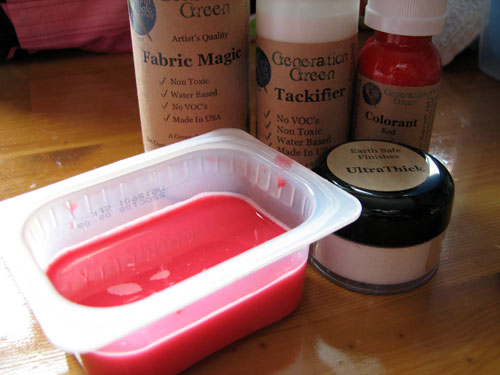
I followed the exact measurements but look how watery it was! I’m thinking maybe next time I’ll try less water or maybe the acrylic base instead of water? Hmmm…
esffabricpaintwatery.jpg

I don’t think it would have done very well with the stencil so I did not use it. I saved it so I can do a test with it on a scrap shirt. I did use their tackifier as a temporary adhesive for the stencil and it works great for that! I am loving it and can see using it a lot. Maybe I can throw away that temporary spray adhesive that smells and sprays everywhere and gets everything around your project sticky!
esftackifier.jpg

I also used the fabric spray on a t-shirt I made for Sienna that I will post soon. I look forward to experimenting more with these products and the ability to make whatever colors I want on a whim will make me keep on using them.

Earring Crazy

Continuing on the earring kick, I joined an earring swap and made these for 2 partners (preface to say I am not totally happy with the photos! They didn’t really capture the essence and I have to work on that):
leafearrings.jpg
One partner got the green pair and the other red. I also made these for them:
funkyearrings.jpg
beadearrings.jpgblueflowers.jpgcopperhearts.jpg

And of course here are a couple for myself (although I did make myself a pair of the above copper hearts too!)
greenbrass.jpgbrassflowers.jpg

And guess what I made? Something I’ve been wanting to make for awhile…
paintframe.jpg
I painted a couple of wooden frames with a new kit I got that is eco friendly called Earth Safe Finishes and I used Mod Podge to secure some fabric and my dad gave me some screen door mesh for this…
finishedholders.jpg
And do you know what it is?
lgonthewall.jpgsmonthewall.jpgbothonthewall.jpg
Woohoo!! The top one is 8×10 and the bottom one is 5×7. There wasn’t really any rhyme or reason to how I laid out the earrings and am happy to have room to add more. I’m so glad that I am now able to see most of my earrings (my post earrings and ear wires are still in the jewelry box.)

T-shirts!

I made some t-shirts recently and they were so much fun!

As part of a going away present for Geneva and Co. I made them all Brooklyn shirts (ya know, in case they forgot where they moved from or also to let those Maine people know they are tough!) I pulled out the ColorArtz again (first time here and then here). I love using it and plan to use it more often (I just bought a big can of air too!). I learned my lesson the 2 previous times and really taped around the stencil (I used freezer paper) and used plenty of scrap paper. I did not get any overspray. I used a different color for each person. I even made one for Lennox but it is a bit big for her right now. I had grand ideas of putting a few images on the shirts but I was afraid it would be overkill so just kept it simple instead.
brooklyncolorartz.jpgbrooklyn2colorartz.jpgallshirts.jpg
The gray one is for Layne. I couldn’t find a white pocketless T.
closeup1.jpgcloseup2.jpg

I also made a t-shirt for Nico’s birthday and finally put the t-shirt vinyl to good use. I bought a sample kit from Craft Vinyl and I love it! So easy to work with and I just noticed that he now has glitter and glow in the dark t-shirt vinyl! Fun! When I first bought it, I had a question and he had me call him on his 800 number to help me out. He is super nice!

tshirtvinyl.jpg
Traced out the letters and cut them out.
vinylplacementnico.jpg
I ironed them on and once cooled, peeled off the protective layer. It’s really easy to get off.
robotstencil.jpg
Nico likes robots so I stenciled a robot on the bottom. I had in mind to try out the new Earth Safe Finishes kit for the stencil but when I mixed it up, it seemed too watery to hold up so opted to go with the gocco fabric paint (tried and tested!). I plan on doing some tests with the Earth Safe Finishes for another post. I did use the Tackifier included in the kit to hold down the stencil. That worked really well and much better than using the stencil spray. nicoshirtdonesienna.jpg

You can see Phoenix and Nico wearing their shirts in my Hugs post.

June craft challenge

I am participating in Christy Nelson’s craft challenge for June. They are turning out to be quite fun and not as stressful as I thought it would be. For this month, I am also hosting a swap for the challenge where we mail out our completed projects to our partner. A chance to win a prize AND get someone else’s wonderful creation! True to form, when the packet came, I thought to myself, “Oh boy! What am I going to do with this stuff?” I was a little concerned because the packet included some clay. With all the crafts I dabble in, I don’t do clay (besides precious metal clay) so I am not very familiar with working with it.

I thought I took a photo of all the supplies but I can’t find the image! Argh! I know I said that about last month’s challenge and couldn’t find the image. Well, I found it while looking for this month’s image. I guess I’ll find it during the August challenge (there is a month break for the challenge so no July challenge). Anyhow, Jennifer aka hippofairy has posted an image on her blog so here is a link. The only difference is I got white clay and my glitter paper were blue and green. So we got some clay, a pill bottle, raffia, glitter paper and a favor cup. Really, what was I going to do it this???

I did not take step by step photos of my project. I really have to get better with that. I promise to do that for August. Anyhow, I somehow came up with an idea way before deadline. Truly shocking! And I was really happy with the idea so went with it. And I got to pull out my dremel! I love my dremel and I don’t use it in my crafts as much as I thought I would. I used it to drill a hole on top of the bottle and a little window on the side.
dremelpillbottle.jpg

I applied some gesso to the pill bottle, painted it blue and used the raffia as a cord to hang (if my partner wants to). I flattened out the favor cup and painted it a bright yellow. I used my sizzix to cut out a scallop shape and the letters E A T. I worked the clay into something that resembles a bird (it may not be the best bird but I’m happy that it somewhat looks like one!) baked it and painted it. Put it all together and this is what we have:

blogjunechallenge.jpg

A miniature bird feeder complete with sun roof! HA! The “seeds” are little shake on beads made by Tulip that I got ages ago at 75 percent off. It finally came into use! I really think it is so cute! I hope my partner likes it!

« Previous PageNext Page »