Thanks to Rachel, I received the April edition of Christy Nelson’s monthly craft challenge. Every month, Christy assembles a packet of crafting goodies and your challenge, if you choose to accept it (ha! sorry, couldn’t help that!), is to make something out of the supplies. You have to use everything included in the packet, how much to use of it is your choosing. She sells the packets in her Etsy shop and posts photos on her site at the end of the month for voting. The recipients have no clue what will be sent in the packets. Just send her a photo of your finished piece, blog about it and wait for the votes to come in! There are different prizes each month. I’ve heard about Christy’s challenge before and honestly, was too chicken to participate. Today is the last day to send in your submission and of course, that is when I sent mine in. I can be a bit of a procrastinator, as I mentioned several times before!
Anyway, this month’s challenge was indeed a challenge! Here’s what we got:
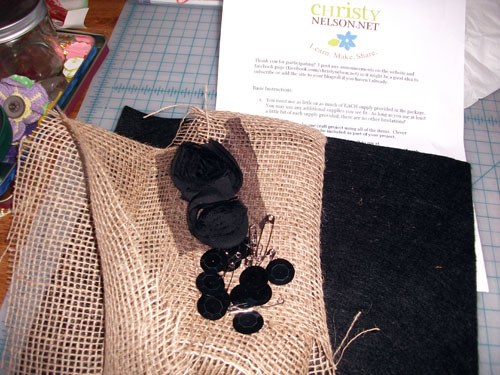
Some black felt, burlap, ribbon roses, large sequins and safety pins. Yikes! What was I going to do with this?? When I first got it (several weeks ago!), I had in mind to make some sort of jewelry display to hang my earrings on. I had an old frame that I thought I could wrap the burlap around and thought I’d decorate it with the sequins and ribbon roses and back it with the felt. I wanted to mull that over for a bit before diving into that as I also wasn’t sure what to do with the safety pins. Periodically, I’d pull out the supplies out of the envelope and look at them. Then put it back in. I realized that my initial idea would not work. Well, maybe it would work technically but I noticed the burlap kind of unraveling and leaving a lot of residue on the black felt. I didn’t think earrings would hold up on it and then they might get caught on the burlap (these sort of jewelry displays are usually made using metal screens.) Hmmm, well that goes that idea!
The deadline was closing in! Last week was sort of a crazy week, as I wrote about in my previous post. And I even thought about forgoing the challenge altogether. Well, I would have felt too guilty to do that plus that would have been the easy way out. Finally an idea started to form in my head yesterday. I was looking at the burlap unraveling and thought I could use the strings to roll it to sort of make little roses to compliment the ribbon rose. First, I wanted to color it and used my Tulip Fabric spray (which quite honestly, have not had much luck with using on actual fabric!). I chose pink and purple and added in some sequins to see if the spray would stick (it did not, you could easily scrape it off with a finger nail).
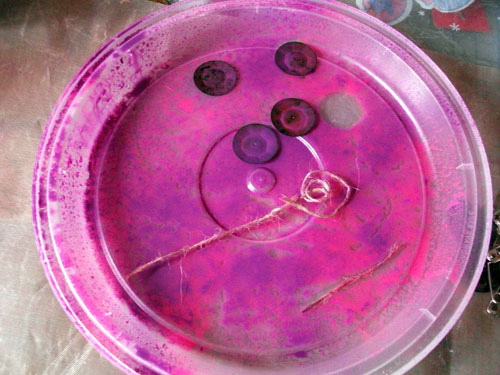
The burlap you see is the pieces I ended up not using. I only remembered to take a photo after I started rolling. I used the sequins as the base of the ‘rose’ and used Diamond Glaze to hold it down while adding a bit of gloss and bling with rhinestones.
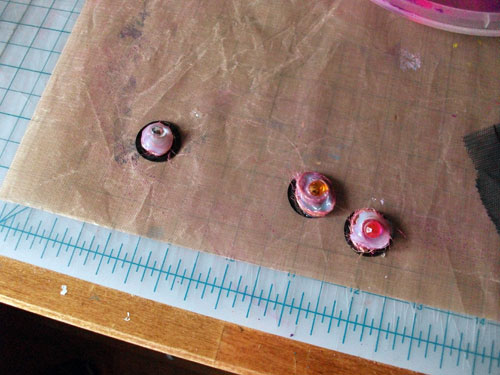
The diamond glaze is still drying in this photo. Now that I think about it, I wish I tried using the painted sequins. I wonder if the glaze would have sealed in the paint. Oh well! File that away for future reference.
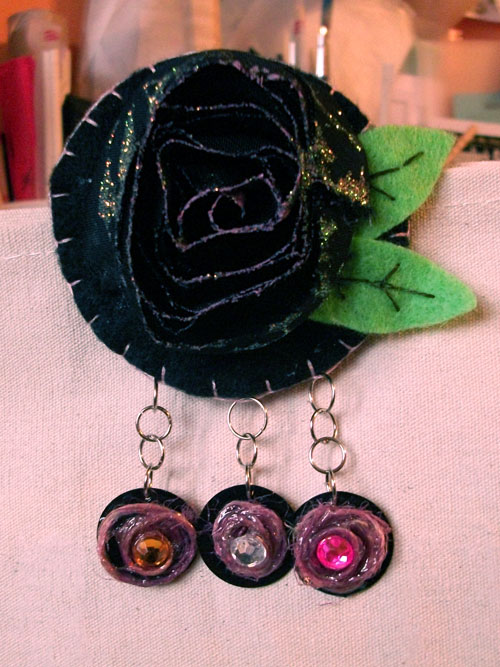
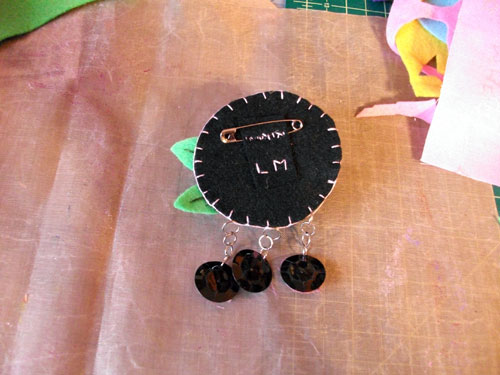
Ok, so at this point is when I stopped. Yves might have come home, Sienna might have called for me, dinner needed to be started (or thought about), I don’t remember. Normally, I would have continued this the next day but last night, after everyone was asleep, I wanted to finish this baby up! And here is what she looks like!
front
back
I cut out 2 circles from the black felt and blanket stitched around it with pink embroidery floss. I used my own green felt for the leaves and embroidered some accents. I dabbed some pink acrylic paint and glitter glue on the ribbon rose (looks so much better in real life). I punched tiny holes in the sequin roses and added some jump rings. I added the safety pin on the back and for fun, embroidered my initials. I think it came out cute! The sequin roses didn’t actually come out how I pictured they should have in my mind but I am actually quite happy with it. I’m really excited to see what others came up with using the same materials. I’ll just wait to see if I win, ahem, before I purchase next month’s (I believe the winner also gets the next month’s challenge for free?!) This was a lot of fun and glad I took the challenge!

 Comments(1)


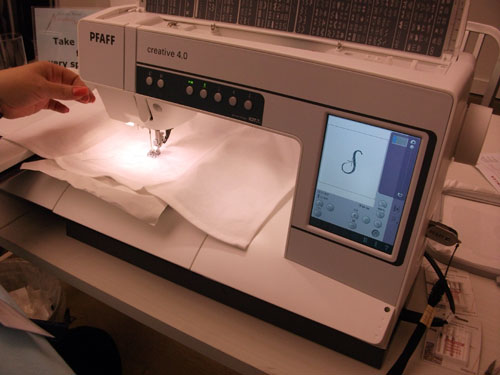
 Rachel is sewing!